- Planning is essential: Define your shed’s purpose, size, and location first. Proper planning saves time, money, and prevents future problems with drainage, space, or permits.
- Choose the right foundation: Gravel pads, concrete blocks, or slabs provide stability and protect against moisture; a solid foundation prevents sagging floors and uneven walls.
- Select durable materials: Use pressure-treated lumber for floors and areas in contact with the ground, exterior-grade plywood or OSB for sheathing, and quality roofing and siding materials to ensure longevity.
- Build carefully, step by step: Construct the floor first, then walls, roof, and finally install siding, doors, and windows. Accuracy in squaring, leveling, and fastening ensures a stable, long-lasting shed.
- Roofing and weatherproofing matter: Properly framed rafters, secure sheathing, roofing underlayment, shingles or panels, and sealed siding protect your shed from water and wind damage.
- Avoid common DIY mistakes: Don’t skip permits, rush measurements, ignore drainage, or use untreated wood near the ground. Following guidelines reduces costly repairs and increases durability.
Building a shed is one of those projects that feels intimidating at first but becomes very manageable once you break it down. Whether you need extra storage, a backyard workshop, or a place to keep lawn equipment out of sight, learning how to build a shed gives you full control over size, style, and cost.
This guide walks you through the entire process—from early planning and material choices to step-by-step construction—using clear explanations and practical tips. The tone is DIY-friendly, but the methods are solid enough to result in a shed that lasts for years.
Why Build a Shed Instead of Buying One?
Pre-built sheds are convenient, but they come with limitations. When you build your own shed, you’re not locked into standard sizes or layouts.
Benefits of building a shed yourself include:
- Custom dimensions that fit your yard and needs
- Better material quality for the price
- Flexibility to add windows, shelving, or workbenches
- Lower overall cost compared to custom-built sheds
- A structure that matches your home’s style
If you’re already comfortable with basic tools, this project is well within reach.
What Should You Plan First?
Before buying materials or picking up a hammer, planning is the most important step. A well-planned shed saves time, money, and frustration.
What Will the Shed Be Used For?
Start by defining the purpose of your shed. This affects everything from size to foundation type.
Common shed uses include:
- Lawn and garden storage
- Tool and equipment storage
- Workshop or hobby space
- Bike or outdoor gear storage
- Small home office or studio
A simple storage shed has different requirements than a shed meant for daily use.
How Big Should Your Shed Be?
Shed size depends on available space, local rules, and how you plan to use it.
Typical shed sizes include:
- 6×8 feet: Basic storage for tools
- 8×10 feet: Lawnmowers and shelving
- 10×12 feet: Workshop or multi-purpose storage
- 12×16 feet or larger: Studio or heavy equipment
Always think ahead. It’s common to outgrow a shed faster than expected.
Where Should You Place the Shed?
Location matters more than most people realize. A poorly placed shed can cause drainage issues, access problems, or code violations.
Consider the following when choosing a spot:
- Flat or easily leveled ground
- Good drainage away from the foundation
- Easy access from your house or driveway
- Distance from fences and property lines
- Sun exposure and wind direction
Avoid low spots where water collects after rain.
Do You Need Permits to Build a Shed?
Many homeowners skip this step and regret it later. Local building codes often regulate shed size, height, and placement.
You may need permits if:
- The shed exceeds a certain square footage
- You plan to add electricity or plumbing
- The shed is permanently anchored
- The shed is close to property lines
Always check with your local building department before starting.
How to Build a Shed: Choosing the Right Foundation
The foundation is the most critical part of your shed because it supports the entire structure. A poorly built foundation can lead to uneven floors, sagging walls, or water damage over time. Choosing the right foundation depends on your shed size, purpose, and soil conditions.
Common Shed Foundation Options
Each foundation type has its advantages and considerations:
- Gravel pad: Affordable, drains well, and simple to level. Works best for smaller sheds or those built on slightly uneven ground.
- Concrete slab: Durable, long-lasting, and ideal for heavy-duty sheds or workshops. Requires more effort and cost upfront.
- Concrete blocks or piers: Raised design protects against moisture and pests. Good for sheds with uneven ground or for storage of sensitive items.
- Pressure-treated wood skids: Portable option that allows you to move the shed if needed. Works for lighter sheds and temporary structures.
For most DIY sheds, gravel pads and concrete blocks provide the best balance between cost, durability, and ease of installation.
How to Build a Gravel Foundation for a Shed
A gravel foundation is popular because it’s cost-effective, quick to install, and provides excellent drainage.
Step-by-Step Instructions
- Mark the shed footprint: Use stakes and string to outline the exact dimensions of your shed. Double-check measurements to avoid mistakes.
- Remove grass and topsoil: Dig down about 4–6 inches to create space for gravel. Ensure the area is roughly level.
- Level the ground: Use a rake and a level to create a flat surface. Even slight slopes can cause instability.
- Install landscape fabric: This helps prevent weeds from growing through the gravel while allowing water to drain.
- Add and compact crushed stone: Spread 3–4 inches of gravel and compact it using a hand tamper or plate compactor. Add more layers if necessary until the foundation is firm.
This type of foundation works best for storage sheds, garden sheds, or lightweight structures where drainage is a priority.
What Materials Do You Need to Build a Shed?
Selecting the right materials ensures your shed is durable, functional, and weather-resistant. Here’s a breakdown of the most common materials:
Lumber and Framing Materials
Most sheds are built with wood framing because it’s strong, widely available, and easy to work with.
- Pressure-treated lumber: Essential for floor joists and areas in contact with the ground. Resistant to rot and insects.
- Standard dimensional lumber: 2x4s and 2x6s are commonly used for wall studs, roof rafters, and ceiling supports.
- Plywood or OSB: Used for floor, wall, and roof sheathing. Choose exterior-grade panels for moisture resistance.
Always ensure your lumber is straight and free from major knots or warping, as this affects the shed’s structural integrity.
Shed Flooring Materials
A strong floor supports everything you store inside. Options include:
- Pressure-treated plywood: Durable and affordable. Excellent for DIY floors.
- Exterior-grade OSB: Cost-effective alternative, though slightly less water-resistant than plywood.
- Concrete slab: Provides a long-lasting, low-maintenance base for heavy-duty sheds.
For wood floors, adding a vapor barrier underneath helps protect against moisture and rot.
Siding Options for a Shed
Siding protects the shed and contributes to its overall aesthetic. Popular choices include:
- T1-11 plywood siding: Easy to install, budget-friendly, and gives a traditional look.
- Vinyl siding: Low maintenance, resistant to rot, but may be less customizable.
- Wood lap siding: Classic look with good durability if properly maintained.
- Engineered wood panels: Offers stability and resistance to moisture.
T1-11 siding is a go-to for DIYers because it combines ease of installation with affordability.
Roofing Materials for a Shed
The roof protects your shed from the elements and affects longevity.
- Asphalt shingles: Affordable, widely available, and blends well with most home roofs.
- Metal roofing panels: Long-lasting, fire-resistant, and lightweight. Perfect for harsh climates.
- Corrugated plastic panels: Lightweight and easy to install but may be less durable in severe weather.
Choosing quality materials for your roof will save time and money on repairs in the long run.
Tools You’ll Need to Build a Shed
Even a beginner can tackle a shed project with a few essential tools. Here’s what you’ll need:
- Tape measure: Accurate measurements are critical.
- Circular saw: Cuts lumber quickly and cleanly.
- Drill and bits: Essential for screws, bolts, and pilot holes.
- Hammer or nail gun: Choose a nail gun if you want to speed up wall and roof assembly.
- Level: Ensures your foundation, walls, and roof are straight.
- Framing square: Helps keep corners square during wall and floor assembly.
Renting power tools is a good way to reduce costs, especially for larger or less frequently used equipment.
How to Build a Shed Floor Step by Step
The floor forms the base of your shed, so getting it right is important for stability and ease of assembly. Using pressure-treated lumber helps protect against moisture and pests.
Building the Floor Frame
- Cut Joists and End Boards: Trim your joists slightly shorter than the total width, allowing for the thickness of the end boards. Cut the end boards to match the shed’s width.
- Assemble the Frame: Space the joists evenly between the end boards and attach them with exterior screws. Make sure boards are flush and the frame is square.
- Level the Frame: Place the frame on the foundation and check that it is flat. Adjust as needed.
- Optional Anchoring: In windy areas, secure the frame to a concrete base with masonry anchors.
Installing the Subfloor
- Lay Plywood: Start with a full sheet in one corner of the frame.
- Secure Panels: Screw plywood into each joist every 12 inches.
- Stagger Seams: Offset sheets so seams do not line up for added strength.
A flat, solid floor makes building the walls and roof much easier and ensures a stable, long-lasting shed.
How to Build a Shed Wall Frame
Wall framing gives your shed structure and shape.
Framing Shed Walls on the Ground
Most DIYers build walls flat and lift them into place:
- Cut wall studs and top/bottom plates to size.
- Assemble each wall section, nailing or screwing studs into plates.
- Frame door and window openings as planned.
- Check that each wall is square using a framing square.
- Label walls (front, back, left, right) to simplify installation.
Raising and Securing the Walls
- With help, lift each wall into position on the floor frame.
- Temporarily brace walls to hold them plumb.
- Check with a level to ensure walls are straight.
- Secure walls to the floor using screws or nails.
- Recheck all corners for square before moving to the next wall.
Patience during this stage prevents uneven walls and structural problems later.
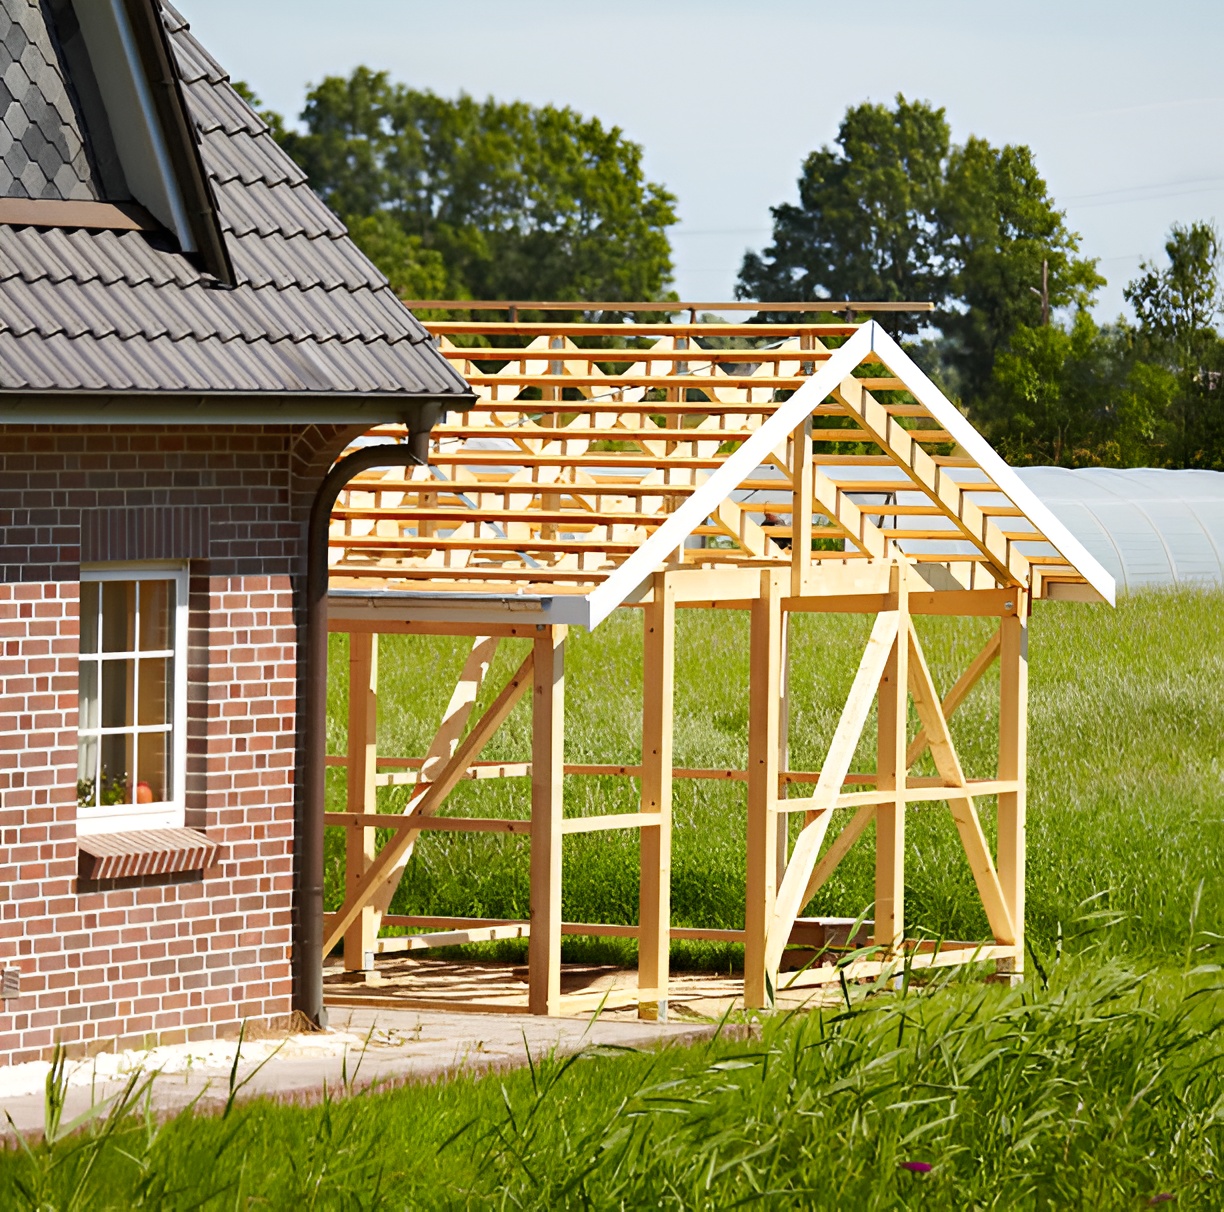
How to Build a Shed Roof Structure
The roof gives your shed strength, protects it from the elements, and completes its appearance. Careful layout and cutting of rafters is crucial, especially for single-slope or low-slope roofs.
Common Shed Roof Styles
- Gable roof: The most common style; two sloped sides meet at a ridge, allowing good water runoff.
- Lean-to roof: Single-sloped design; ideal for sheds attached to another structure.
- Saltbox roof: Asymmetrical style; provides extra headroom in the back.
Framing Roof Rafters
- Plan the Slope: For low-slope roofs, calculate the rise per foot of run. For example, a 12-foot span with a 6-inch height difference gives a 1/2-inch per foot slope.
- Lay Out Seat Cuts: These are the notches where the rafters sit on the wall plates. Two simple methods make this easier:
- Block Method: Place the rafter flat, use a 2×4 block to mark the notch, aligning the top of the rafter with the wall edge.
- Elevated Pattern Method: Raise the rafter on blocks to mimic the slope, then mark the notch based on the height difference minus your notch depth.
- Cut and Test the First Rafter: Only cut one rafter at first. Place it on the walls to ensure a perfect fit before cutting the rest. Shallow notches (about 1/8-inch) preserve structural strength; deeper notches (up to 3/8-inch) can improve seating but may not meet building codes.
- Use as a Pattern: Once the first rafter fits correctly, use it as a template to mark and cut all remaining rafters.
- Install Rafters: Position rafters on wall plates and secure at consistent spacing. Use hurricane ties or metal connectors for extra strength. If using a ridge board, attach rafters at the peak for stability.
Installing Roof Sheathing
- Lay plywood or OSB panels across the rafters.
- Fasten with nails or screws, making sure panels are straight and flush.
- Check for flatness along the entire roof. A level, rigid sheathing surface ensures shingles or metal panels sit correctly and prevents sagging.
Properly laid and cut rafters, combined with sturdy sheathing, form a strong, level roof that will last for years and make finishing easier.
How to Install Roofing on a Shed
Once the roof frame and sheathing are in place, the final roofing materials protect your shed from water and weather.
Installing Asphalt Shingles
- Lay Roofing Felt: Cover the sheathing with roofing felt or underlayment for moisture protection.
- Install Drip Edge: Attach metal drip edges along the eaves and gables to channel water away from the roof edges.
- Add Starter Strip: Place a starter row along the eaves to prevent leaks at the edges.
- Lay Shingles: Begin at the bottom and work upward, overlapping each course according to manufacturer instructions. Stagger seams to prevent water penetration.
- Fasten Properly: Nail shingles in the correct locations and spacing to ensure wind resistance and water-tightness.
- Cap the Ridge: Finish the roof with ridge shingles or a metal ridge cap for a clean, weatherproof peak.
How to Install Shed Siding
Siding comes after the roof to prevent water infiltration.
- Start from the bottom and work upward.
- Keep panels level and use a spacer if needed for expansion gaps.
- Seal all edges, seams, and corners with caulk or exterior sealant.
- Prime any exposed wood edges to protect against moisture.
- Paint or stain for added protection and aesthetics.
Proper siding installation increases longevity and prevents rot.
How to Install Doors and Windows
Doors and windows improve access, ventilation, and natural light.
Shed Door Options
- Pre-hung shed doors: Quick and easy installation.
- Double barn-style doors: Perfect for large equipment like lawnmowers.
- Custom-built wood doors: Allows total control over size and style.
Windows
- Small, operable windows provide ventilation and light.
- Ensure flashing is installed to prevent leaks.
- Consider window placement to maximize natural light without sacrificing wall space.
Doors and windows should be installed carefully to maintain structural integrity and weatherproofing.
Should You Add Ventilation to a Shed?
Yes, especially if you store tools or equipment.
Ventilation options include:
- Gable vents
- Ridge vents
- Small operable windows
Proper airflow reduces moisture buildup and mold.
How to Build a Shed That Lasts in All Weather
Weather resistance is often overlooked.
Important weatherproofing steps:
- Seal all exterior seams
- Paint or stain siding
- Use flashing around doors and windows
- Elevate the shed slightly above ground
These steps protect your investment long term.
Electrical Considerations for a Shed
If you plan to use power tools or lighting, consider electrical early.
Options include:
- Running underground conduit
- Solar-powered lighting
- Extension cords for occasional use
Electrical work may require permits or professional installation.
How Long Does It Take to Build a Shed?
Time depends on experience and shed size.
Typical timelines:
- Planning and prep: 1–2 days
- Foundation: 1 day
- Framing and roofing: 2–3 days
- Siding and finishing: 1–2 days
Most DIY sheds can be built over a few weekends.
Common Mistakes to Avoid When Building a Shed
Learning how to build a shed also means knowing what not to do.
Common mistakes include:
- Skipping permits
- Poor foundation prep
- Using untreated wood near ground
- Rushing measurements
- Ignoring drainage
Avoiding these mistakes saves costly repairs later.
How Much Does It Cost to Build a Shed?
Costs vary by size and materials.
Typical price ranges:
- Small shed: $500–$1,000
- Medium shed: $1,000–$2,500
- Large or custom shed: $3,000+
Building yourself usually saves 30–50% compared to buying pre-built.
Final Thoughts
Building a shed is a rewarding project that combines planning, craftsmanship, and practical problem-solving. When you take the time to plan properly, choose durable materials, and follow sound construction steps, the result is a structure that adds real value to your property.
Now that you understand how to build a shed from planning through construction, you can move forward with confidence and create a space that fits your needs perfectly.